Building a Container Image
Containers are incredibly useful, even when just running images built by others. However you can make your own container image as your custom solution for anything you like. The key element is to write your own Dockerfile. As an example I will write a Dockerfile to run a Minecraft server below. As you’ll see, this can all be accomplished in very few lines of code.
Base Image: Alpine Linux
Container images need to be built on a base image. And as we’re most often hosting Docker on a Linux distribution, we need a Linux distro as the base of the image. The most common Linux distribution to use for containers is Alpine Linux, due to it’s small default footprint and performance tuning.
While Alpine Linux is great as a container base, it uses its own flavor of all of the basic utilities. For example, the package manager for Alpine is not apt or yum/dnf… it’s a utility called apk. Keep an eye out for the Alpine variations of commands that are noted on this site in order to use Alpine well.
Preparation
Since Dockerfile commands are more-or-less the same commands you would issue to a full installation of your chosen Linux distribution, completing a test installation to a full virtual machine first can be very helpful for figuring out the commands you need for your container image. Once you have the list of commands from the full virtual machine installation you are only left the much easier task of adapting those commands for use in your Dockerfile.
Creating the Example Service: Minecraft Server
It should be easier to understand the layout of the Dockerfile by stepping through the creation of an example. Let’s say that I was running my own Minecraft server on a traditional server or full virtual machine, but now wanted to run it in Docker instead (running it in Docker would confer the benefits of containerization: portability, faster service start up, easier management through division of the service into components, etc.) To prepare I am building a traditional virtual machine in order to record the commands needed to get the environment up and running. Since I intend to build the Docker image based on Alpine Linux (the most popular base for Docker images) I will also build my test virtual machine on Alpine.
Installing to a Full Virtual Machine
For anyone who wishes to run the Alpine install long-term, instead of the container, check out the Alpine installer configuration options I used
After completing the Alpine install on a fresh virtual machine I issued the following commands to install a Minecraft server:
- Enable the Alpine community repository in order to obtain the Java Runtime Environment (JRE) in a later command
- Add the necessary packages
- Create a text file in the current directory (where we will launch Minecraft server from eventually) to bypass the EULA check
- Download the Minecraft server.jar file. You can find the current URL for the server download at https://www.minecraft.net/en-us/download/server
- Alpine Linux does not come pre-installed with a firewall or network traffic manager. The preferred solution is to install
iptablesand set it to start automatically, then define the traffic rule, as below. Minecraft server utilizes TCP port 25565.
- Finally we’re ready to launch the Minecraft server, through a Java launcher running in a
tmuxsession. The Xms option defines the minimum memory to allocate to the Java virtual machine, and Xmx defines the max that it will ramp up to.tmuxis used in place of the common Linux commandscreen, which is not being supported as broadly anymore.tmuxallows a program to run in a detachable shell session, which is especially handy for programs like Minecraft server that do not exit after running (they continue to run continuously) and can accept commands from the command line while they still run in the background. In other words, if Minecraft was coded to run in the background on its own and accept commands through a utility program,tmuxwouldn’t be needed.
Note
Use the keyboard combination CtrlbSpaced to breakout of the tmux session (detach it). Use the command tmux attach-session to reattach to the last running tmux session. Use CtrlbSpace? while in a session to list commands.
Coding the Dockerfile
The Dockerfile should be formatted in Unix EOL format, which is easiest to achieve by using a program like Notepad++. You can find the setting for the Unix EOL under the menu Edit > EOL Conversion > Unix (LF).
Create a file called Dockerfile with no file extension. It should be filled with the following lines:
- Use the Alpine 3.17.3 base image (or latest version of Alpine). Base images are already hosted in the Docker repository
- Set environment variables. We’ll eventually use these environment variables when instantiating a container, on the command line or in a Docker Compose file. The values we set here are default values that may be overridden by the environment variable definitions we set later
- The
RUNcommand causes a command to run during the image build process (not afterward, when the container is instantiating). The command here adds the Java JRE package from the Alpine repository. Interestingly, there is no need to enable the communitry repository this time, probably since the Docker Alpine base image already has it enabled
- As we’ll see in a subsequent step, it is best to download and include the Minecraft server.jar file along with your Dockerfile to build the image, instead of using wget to download it (notice that we did not install wget this time either). The next command puts a copy of the server.jar file into the built image, copied from the build source we will put together later on. I’m also collecting the server.jar file, and the others we create later on, in a new directory at the root of the container’s file system - a directory called “data”. If the directory we copy into doesn’t exist then the
COPYcommand creates it. Including the trailing slash in the command below copies the file to the specified directory, rather than copying to the file system as a file with the new file name specified.
- The
WORKDIRcommand changes the selected working directory within the image, during the build process and for build purposes only
- Lastly we come to the
ENTRYPOINTcommand. This command records to the image any commands that an instantiated container should run when it starts up. Alternatively we could have used theCMDcommand, however there are important distinctions between these two commands:CMDcan be overridden by specifying a command when instantiating a container (during the Docker command call).ENTRYPOINTdoes not allow this.- There are two forms for both
CMDandENTRYPOINT: shell or exec. The preferred form is the exec form, which is shown below with square bracket notation and with each argument passed in a comma separated list. The shell form passes the command just as it is usually issued on a command line. The difference is how the shell form expands variables, and the exec form does not, unless you use the exec form to call the shell directly as is done below. - Every Dockerfile must have a
CMDorENTRYPOINTcommand
- The variables in the command below are enclosed in curly braces due to the fact that the argument syntax requires a ‘G’ to follow the value that is passed in. The curly braces prevent an incorrect variable name match when the command line interpreter mistakenly includes the ‘G’ in the variable name.
- The EULA environment variable can only be used if it is evaluated by the container after instantiation, rather than at build time. Since the only code from the Dockerfile that is evaluated in a running container is in the
ENTRYPOINTthen it makes sense to include the code to set the EULA file IN theENTRYPOINTdefinition, along with everything else. - There is no need to run the
javacommand behind atmuxcommand inside the container. This idea is useful in a full virtual machine so that the virtual machine can still be interacted with (for updates, administration, etc…) while the Minecraft server runs. If you need to do these same things for a container you would just stop it and update the image build, then relaunch the container. Sotmuxis no longer needed.
- That’s the end of the Dockerfile, but there is another important component from the full virtual machine build that we have not used here -
iptables. In the Docker Compose definition we will create later we will define port mappings through the Docker API. Docker will impose these port mappings on the running container usingiptableson its own. So we don’t need to addiptablesourselves.
Expand here to see the full Dockerfile, all together this time
Packaging your Dockerfile and Source Files
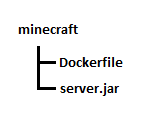
While you could certainly construct your Dockerfile to not require accompanying source files, my end goal is to upload the bundle as a .tar file to the image build section in my Portainer Docker management system. In order for me to get a successful build I need to create a directory on my admin machine and place the Dockerfile and the Minecraft server.jar (obtained from Minecraft Server Download) in the top level of the directory, then create a .tar file where these files are at the top level of the .tar file. You can create a .tar file with the 7zip archiving program. When selecting the files to include, multi-select the Dockerfile and the server.jar files and then have 7zip create the .tar - don’t tar the directory or else this will cause a directory to exist at the top level of the .tar file.
Next we upload to Portainer and build the image. I named my image minecraft:custom, which will be referenced in the Docker Compose
Docker Compose / Docker Stack Definition
The final step is to create a Docker Compose for your image to be launched from. In Portainer this is done by creating a Stack. However, before we create the stack we should create a Docker volume and network
Docker volume and network definition
The volume definition is trivial as you only need the default options. You can set the name of the Docker volume to minecraftdata.
Your network definition will depend on your network setup. In my case I will need to define a new VLAN with specific rules in my firewall, tag this through my switch and hypervisor down to my Docker host, and then into a new Docker network definition. Alternatively you can use the port mapping that I show below and simply point your Minecraft client at the IP address of your Docker host (not recommended for production deployments as this can carry security concerns).
Docker compose and stack definition
The elements of a Docker compose definition are discussed elsewhere on this site, so I will cut to the chase of the full compose definition below:
Launch this definition and you will see the container start and run, and then with a few more minutes’ time the Minecraft server will be available at the IP address of your Docker host. With the Docker volume in place, even if you take down the running container and start it again, the server will still load the server data and the save. Without the Docker volume a restart of the container will lose all game progress and start a new world.